Concrete is a durable and long-lasting material that is commonly used in construction. However, it is not immune to damage, especially when exposed to high-pressure water from a pressure washer. Pressure washing can cause damage to concrete surfaces, leaving them with cracks, chips, and other imperfections. Fortunately, there are ways to fix this problem. In this article we will discuss step by step procedure on how to fix damaged concrete from pressure washer and recover your concrete surface to its original condition.
If you have newly poured concrete, always consider how long should concrete cure before washing. Generally, concrete takes about thirty days to fully cure and achieve its full strength.
How To Fix Damaged Concrete From Pressure Washer: 6 Steps to Follow

Read on below for detailed steps.
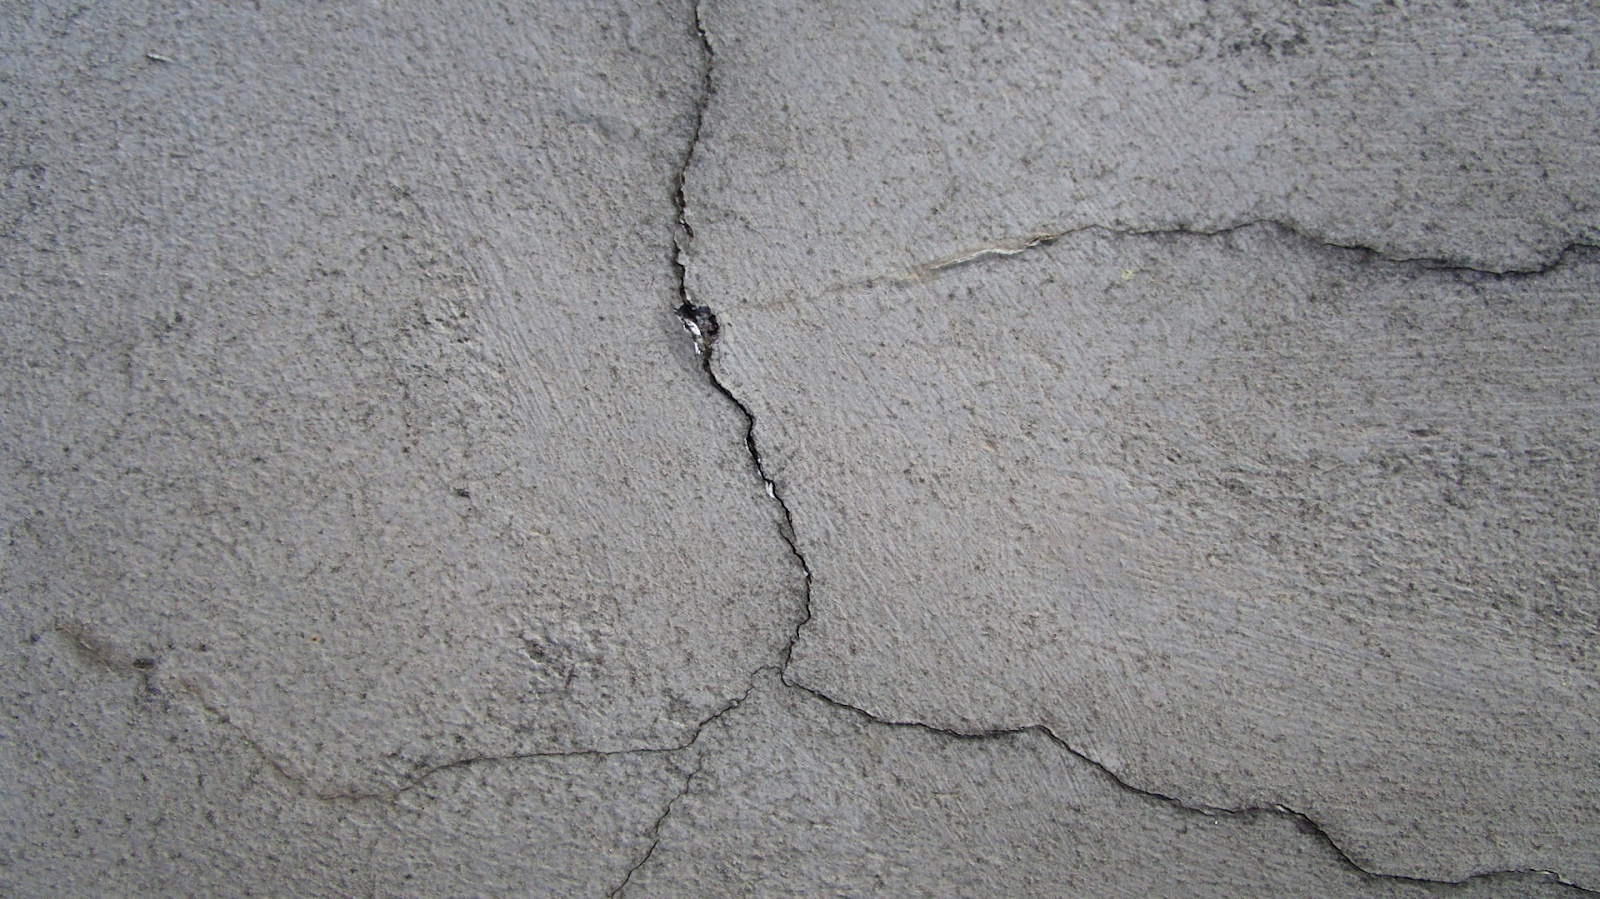
Step 1: Assess the Damage
The first thing you need to do is assess the extent of damage to concrete by pressure washing.
You will be able to tell whether your concrete was damaged by the force of water or if it has been weakened over time and needs repair. If there are cracks in your concrete walkway or driveway, then it is likely that they were caused by the pressure from the sprayer nozzle. However, if there are cracks throughout your entire property, then chances are good that they were caused by water erosion over time.
If there are small holes or scratches on top of your concrete surface due to improper cleaning techniques, then these can be repaired easily with an adhesive caulking compound such as Endura-C Structural Sealant. Read more about concrete adhesives and caulking compounds here.
However, if the damage is severe, you may need to hire a professional to repair it.
Step 2: Clean the Surface
Before repairing the damaged concrete, you need to clean the surface thoroughly. Use a pressure washer to remove dirt, debris, or loose concrete from the surface. Make sure to use a low-pressure setting to avoid causing further damage to the concrete.
If you are being cautious about causing more damage to the surface by using a pressure washer, then simply use a deck brush and a cleaning solution. Once the surface is clean, let it dry completely before proceeding to the next step.
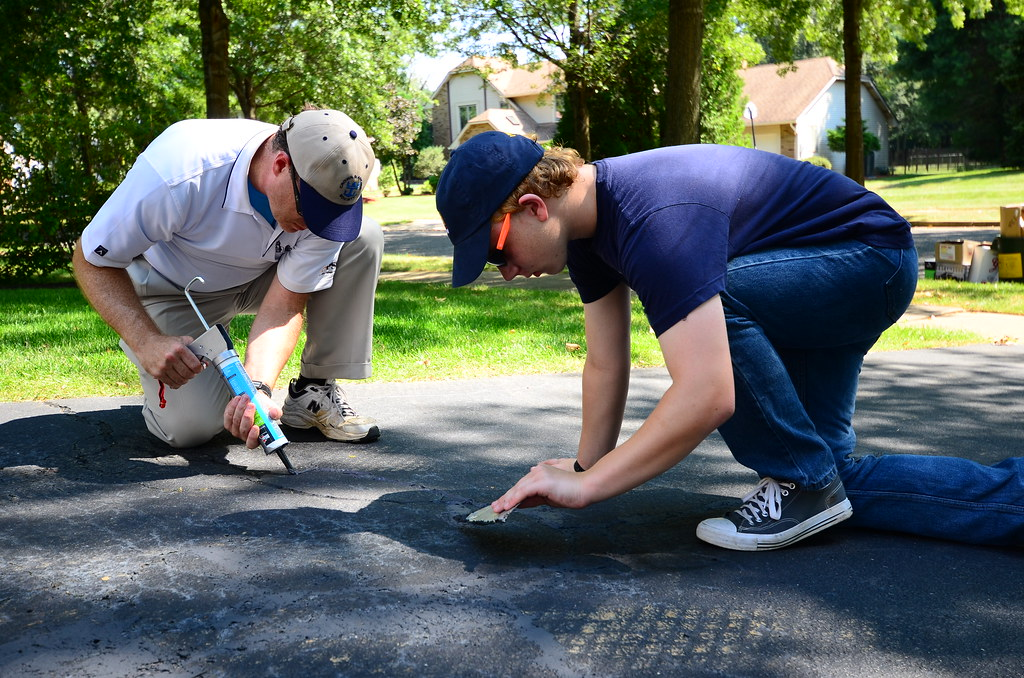
Step 3: Fill in the Cracks
If there are cracks in the concrete, you must fill them in before you can repair the surface. Use a special concrete patching compound to fill in the cracks. Concrete patching compounds come in different colors so you can match it with your existing concrete color. They work well for small cracks and holes up to 1/4 inch wide, but they aren’t very effective at fixing larger ones.
Apply the compound with a trowel, filling in the cracks completely. Smooth out the compound filling with the trowel and let it dry completely.
Step 4: Repair Chips and Holes
Repairing concrete is a simple task, but it requires patience and a few tools. If you’re working on a structure that has developed cracks or holes by multiple sessions of pressure washing, there are two options for repairing those areas: You can either fill them in with putty or use patching material to cover the hole.
While both methods will work fine for small holes and cracks, larger ones may require more than one type of repair material. If this is the case, begin by applying putty around the entire area where your crack or hole is located. Then use another layer of putty as a final coat around any gaps between pieces of concrete so they don’t touch each other when movement occurs beneath them due to weather conditions or earthquakes (if applicable).
Once all layers have been added together, it is time to apply a coating. This will ensure that water does not seep through during rains and storms. This is especially important if there are pools on your property that need attention.
Step 5: Sand the Surface
Once the repair compound has dried, use a sanding block to smooth out the surface of the concrete. Rub the surface with a sand block until it is smooth. For a small surface, use your hands for sanding; however, for a larger area, you can use an electric sanding tool. Remember to wear a mask and eye protection while sanding to avoid inhaling dust particles.
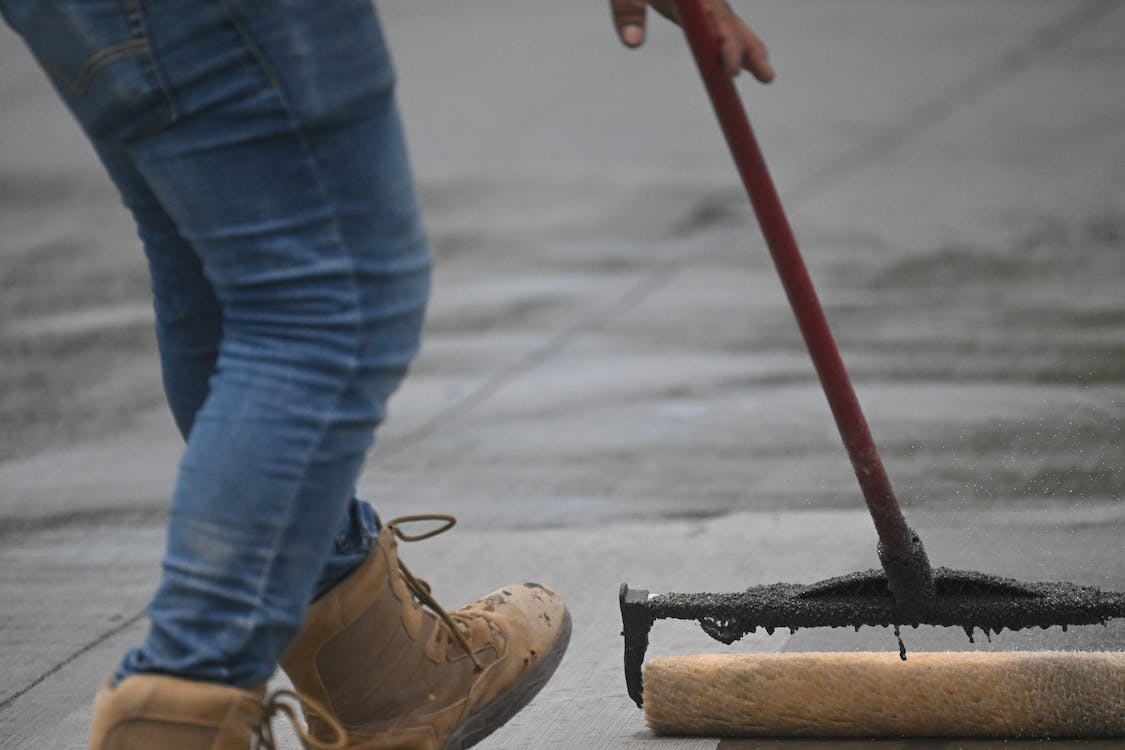
Step 6: Apply a Concrete Sealer
To protect the surface of the concrete from future damage, follow these steps:
- Apply a concrete sealer
- Choose a sealer that is specifically designed for use on concrete surfaces
- Apply the sealer with a roller or sprayer, making sure to cover the entire surface of the concrete
- Let the sealer dry completely before using the surface
Conclusion
Fixing damaged concrete from pressure washing is not difficult, but it requires some time and effort. By following the steps narrated in this blog post, you can repair your concrete surfaces and restore them to their original condition. Remember to assess the damage, clean the surface, fill in the cracks, repair chips and holes, sand the surface, and apply a concrete sealer. With these steps, you can ensure that your concrete surfaces remain strong and durable for years to come.
However, if you’re still not sure about pressure washing your concrete, you can read our guide on how to clean your driveway without pressure washer.